Skip to navigation

Connecting Microsoft Entra to Laposta

Microsoft Entra is Microsoft’s platform for identity and access management: it controls who can log in and what that person is given access to. Its best-known application is Entra ID, the successor to Azure Active Directory, which organisations use to manage single sign-on, MFA, access policies and more.

With this connection, you can import not only email addresses, but also the first and last names of people in Entra into your Laposta account.

Costs of the connection

The connection has a one-off set-up fee of 295 euros and an annual fee of 395 euros, both excluding VAT. The connection is only available in combination with a subscription.

For more information, please contact the helpdesk.

Setting up the connection

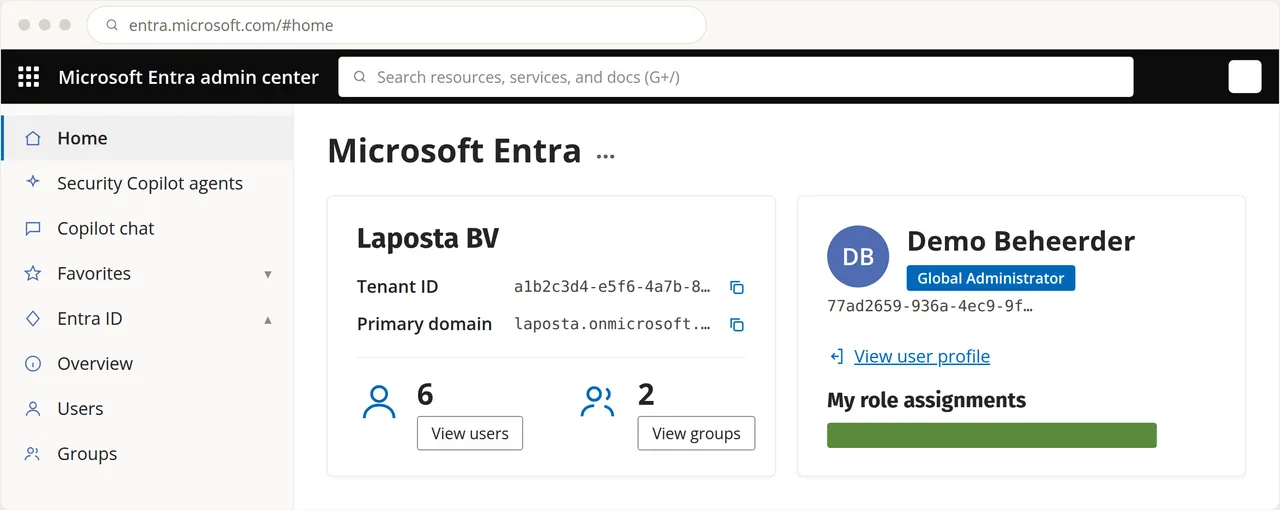
Log in to Microsoft Entra at entra.microsoft.com.
1

Register a new app

The home page of the Microsoft Entra admin center after logging in

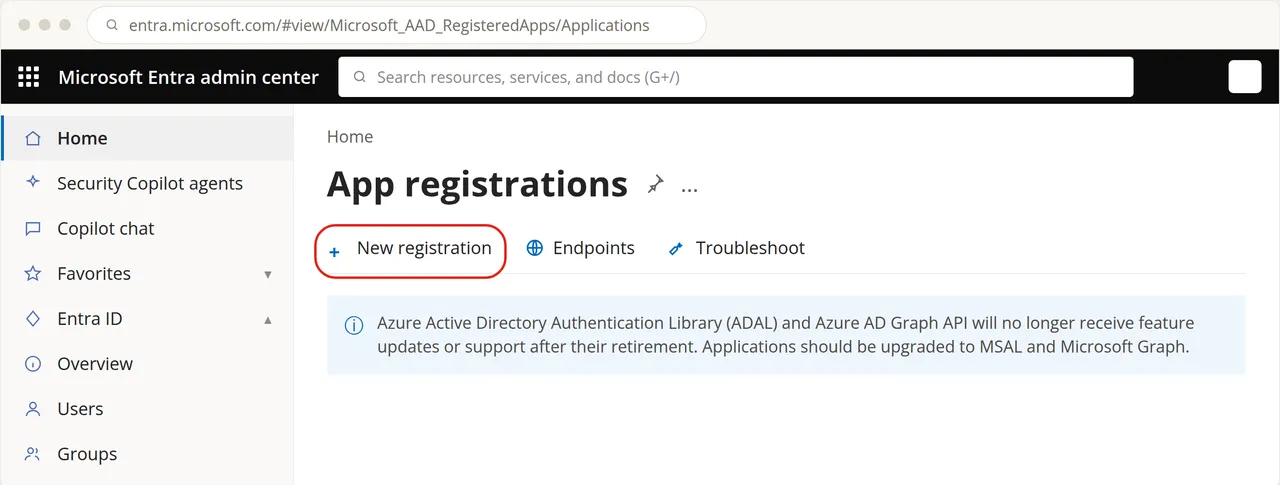
On the left-hand side, click ‘App registrations’ and then ‘New registration’.

The App registrations page with the New registration button
2

Name the application

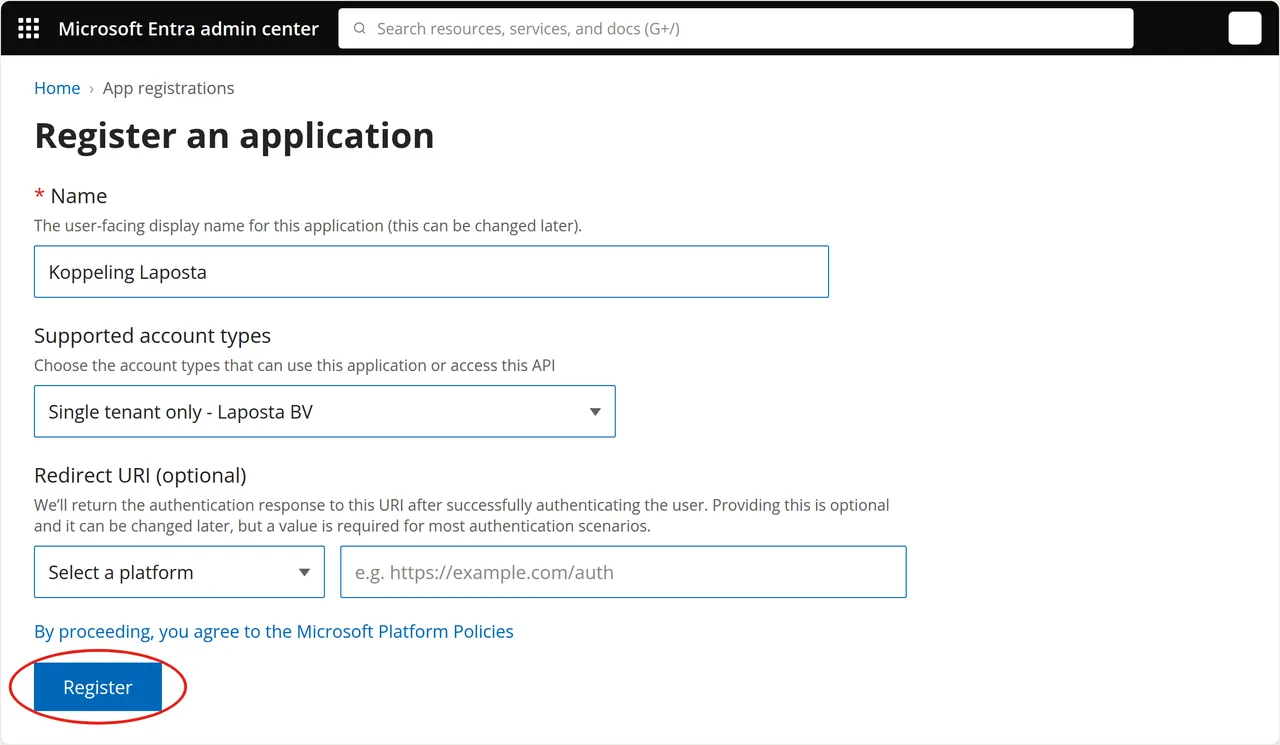
Give the application a name and click ‘Register’.

The Register an application form with the application name and the Register button
3

Add API permissions

The application will now open. Go to ‘API permissions’ and click ‘Add a permission’ to add ‘User.ReadBasic.All’.

Entra automatically sets up ‘User.Read’ for every new registration. That permission reads the profile of a logged-in user and plays no role in this connection, as the connection works without a logged-in user. Leave it in place.
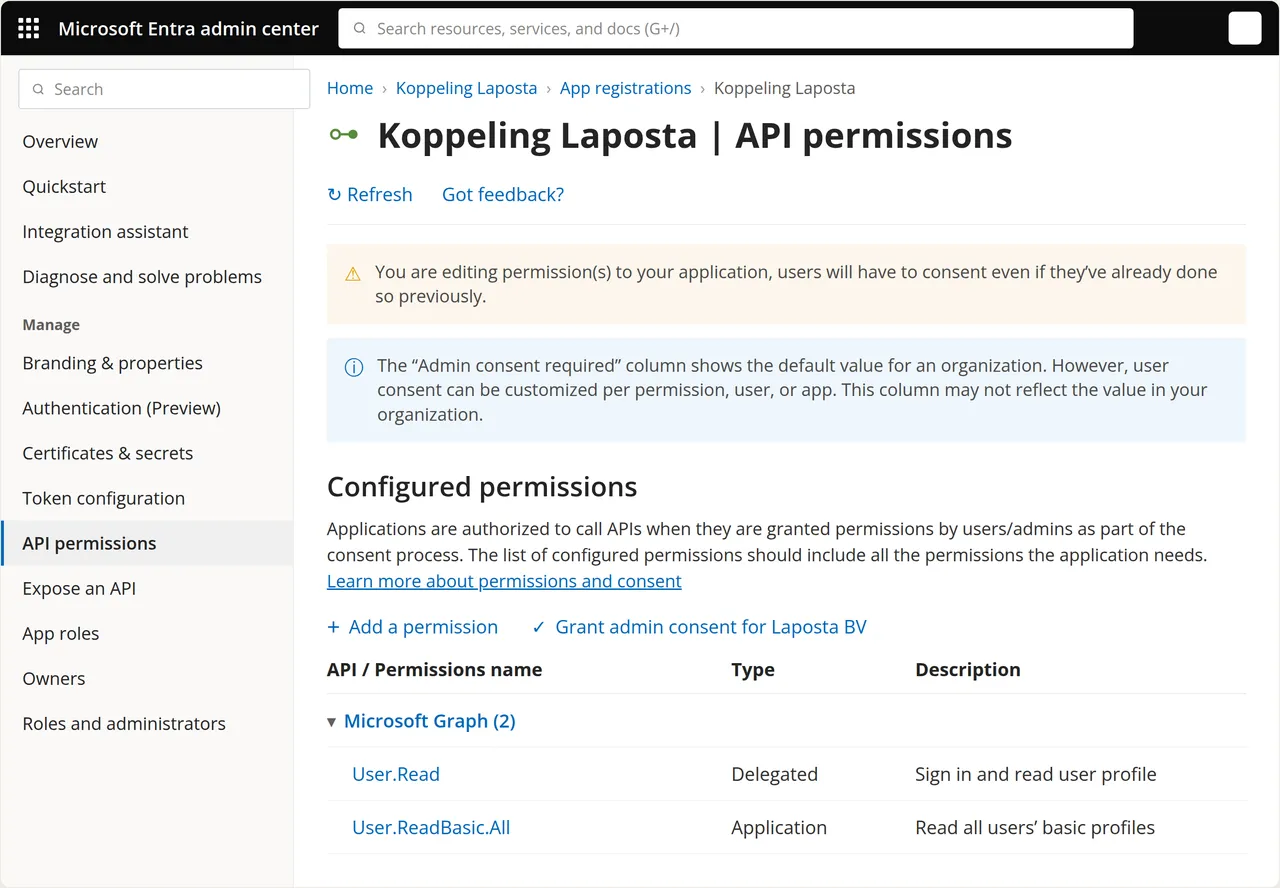
The API permissions page with the Add a permission link above the configured permissions

In the pop-up, select ‘Microsoft Graph’ and then ‘Application permissions’. Type ‘User.ReadBasic’ in the search bar and tick ‘User.ReadBasic.All’.
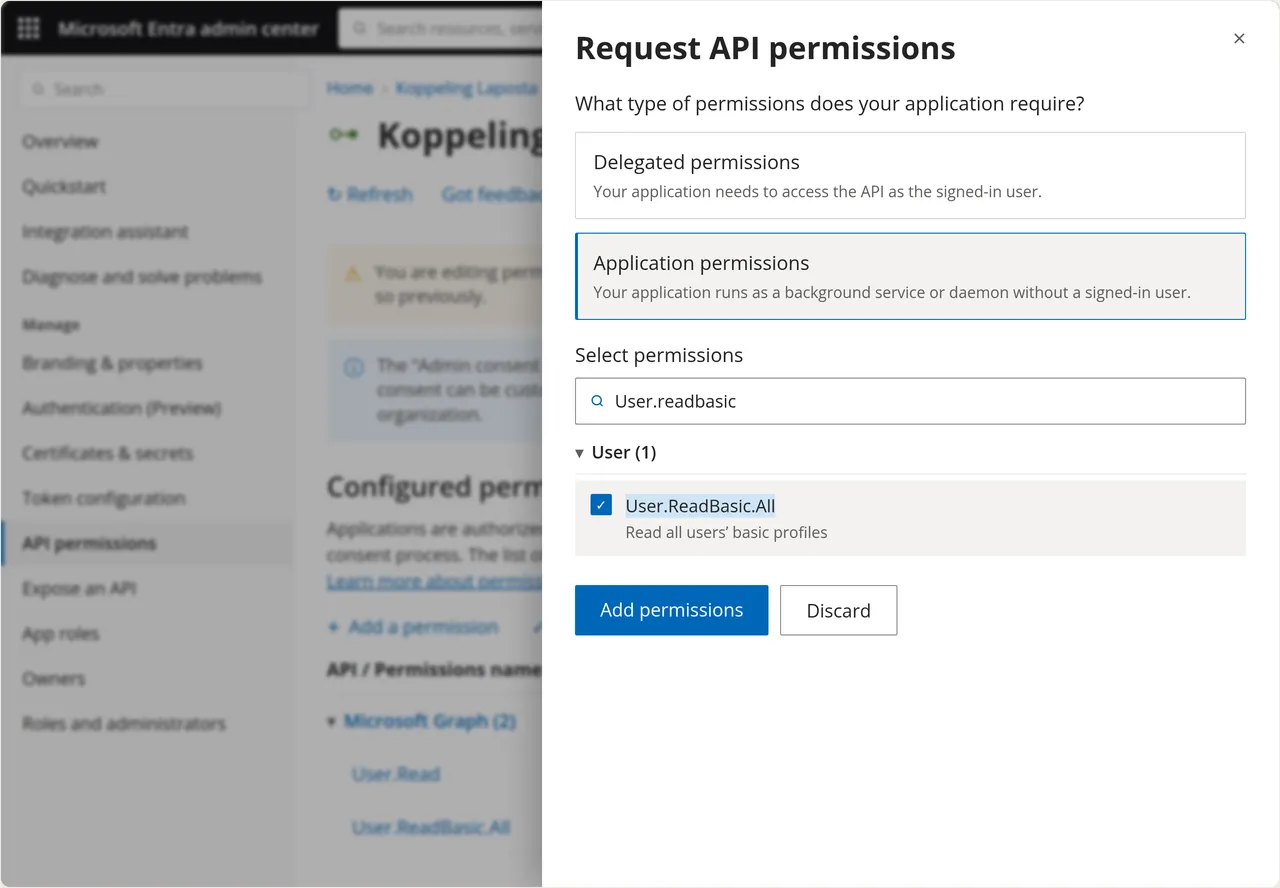
The Request API permissions popup with Application permissions selected and User.ReadBasic.All ticked
Does the connection fail to show any users and display a message about insufficient permissions? If so, add ‘User.Read.All’ in the same way. According to Microsoft, this application permission is required for retrieving users.
4

Create a secret

For authentication, go to ‘Certificates & secrets’ and click ‘New client secret’.
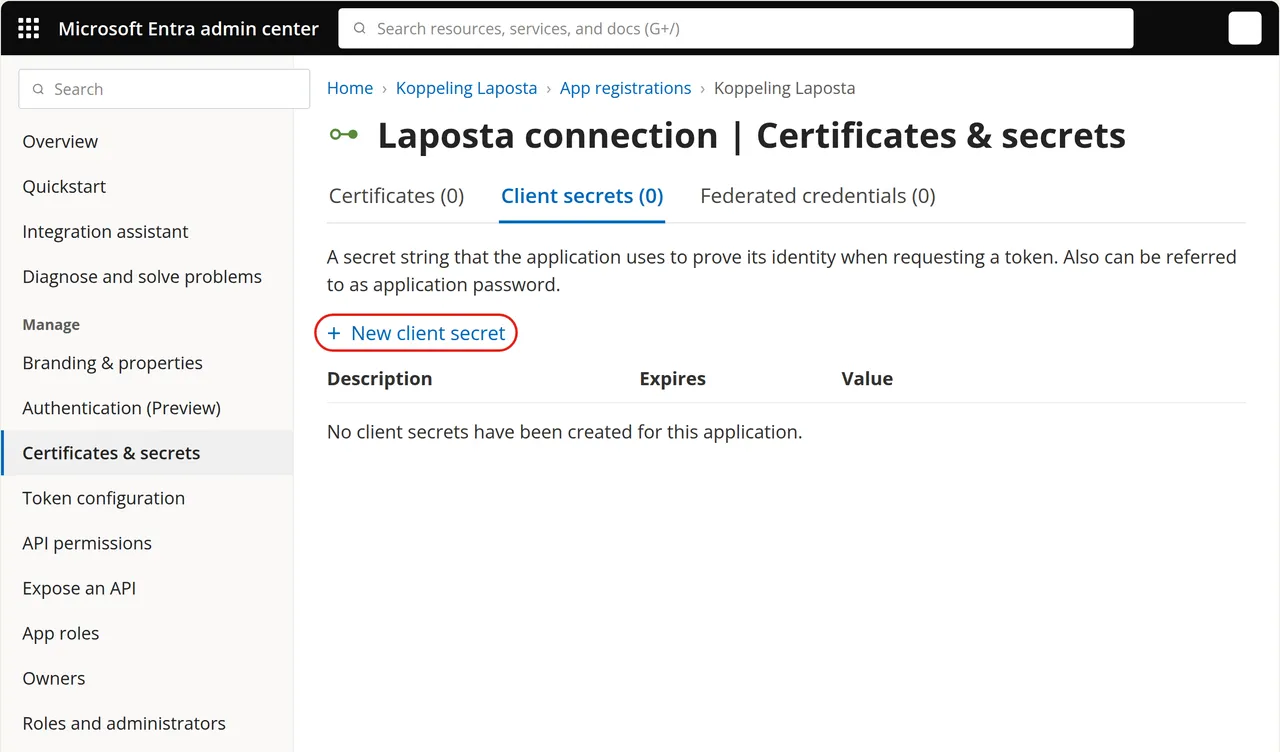
The Certificates & secrets page with the New client secret link

Enter a description and select how long the secret should remain valid.
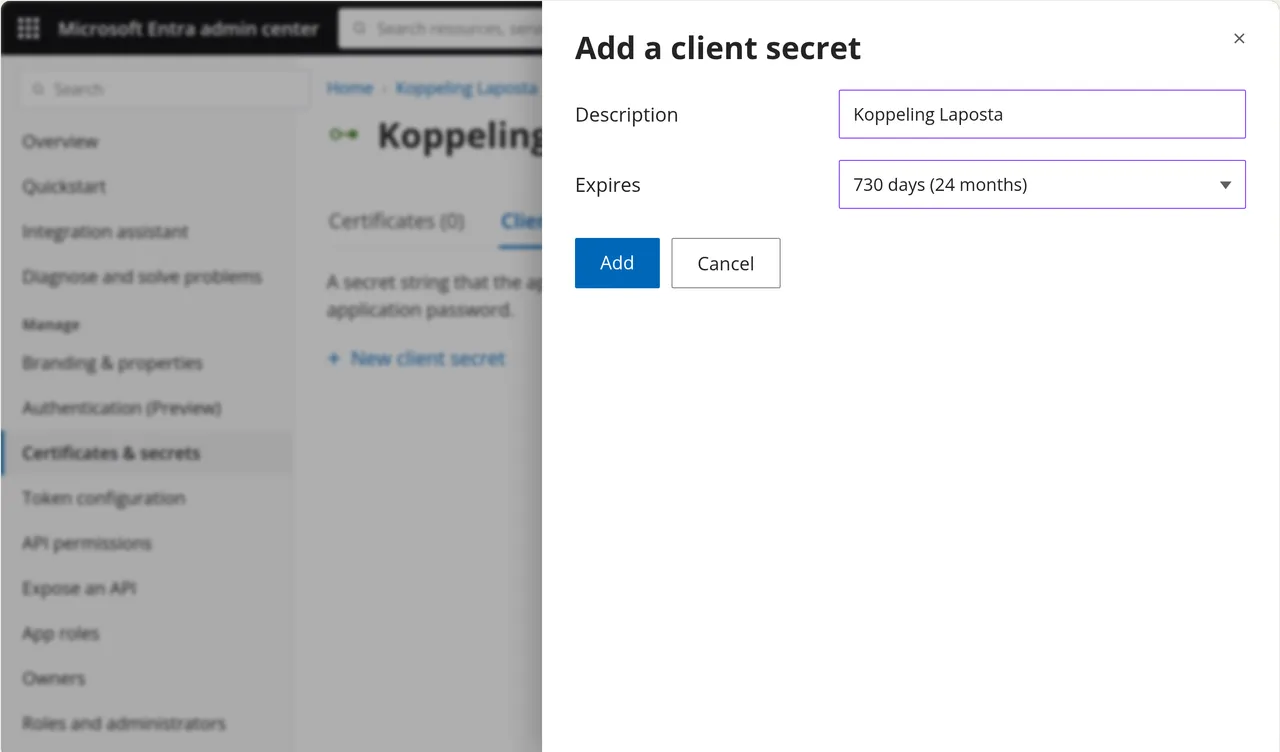
The Add a client secret window with a description and the validity period of the secret
5

Save the secret

Click ‘Add’.

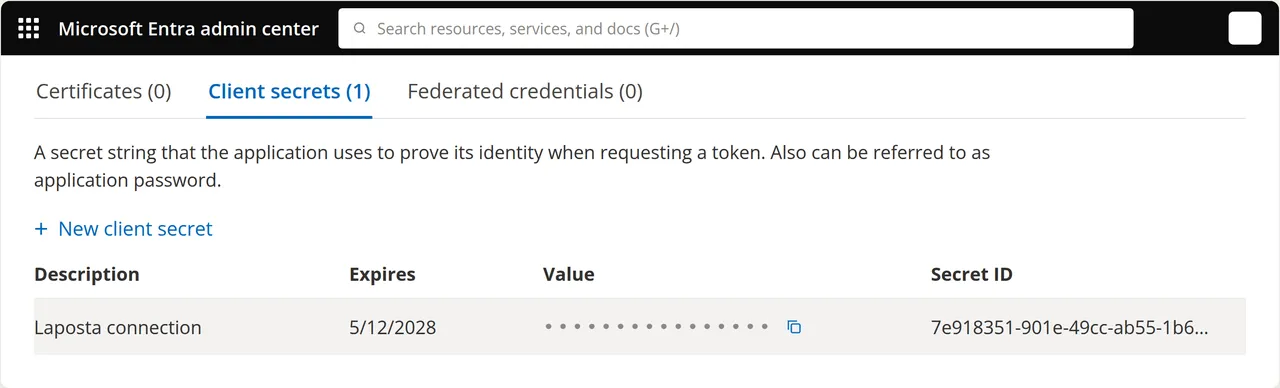
The created secret is only shown once. Copy the ‘Value’ immediately and store it in a safe place.
The created client secret in the Client secrets list, with the copy icon next to the Value
6

Find the Application ID

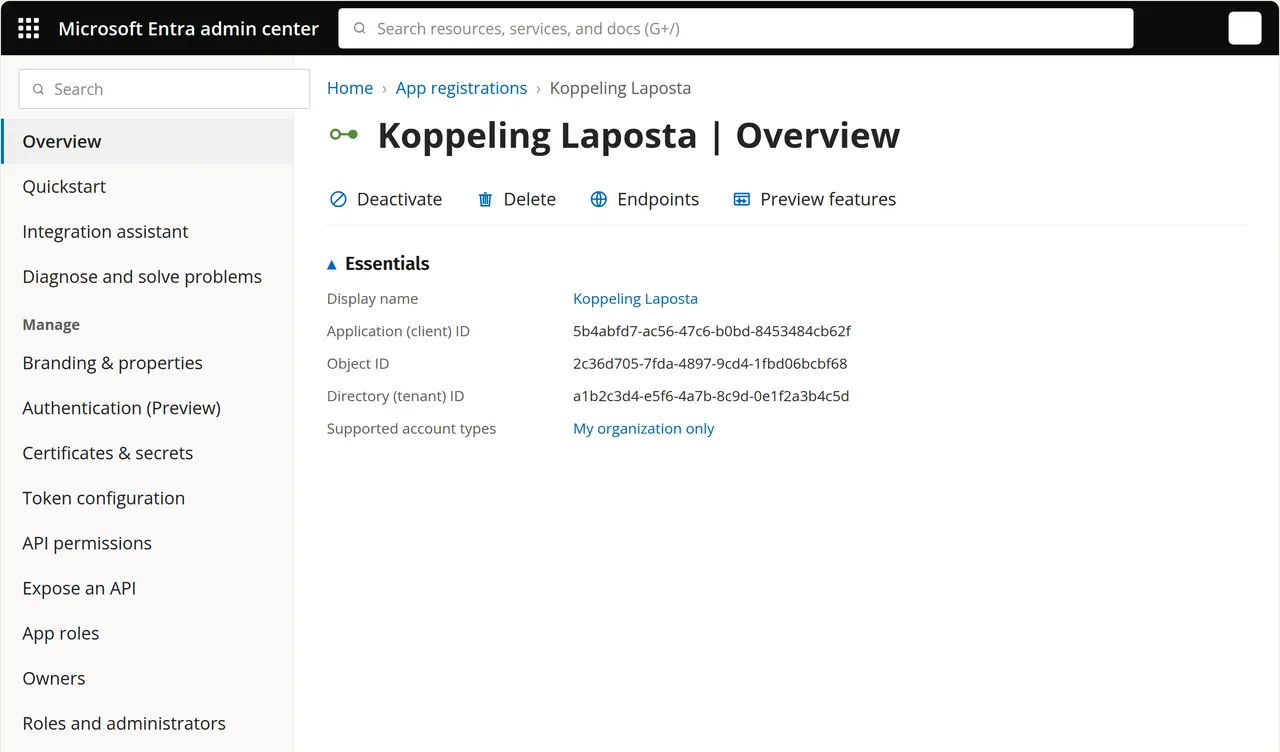
Go to ‘Overview’ and copy the ‘Application ID’ there.

The Application ID under Overview
7

Find the Tenant ID

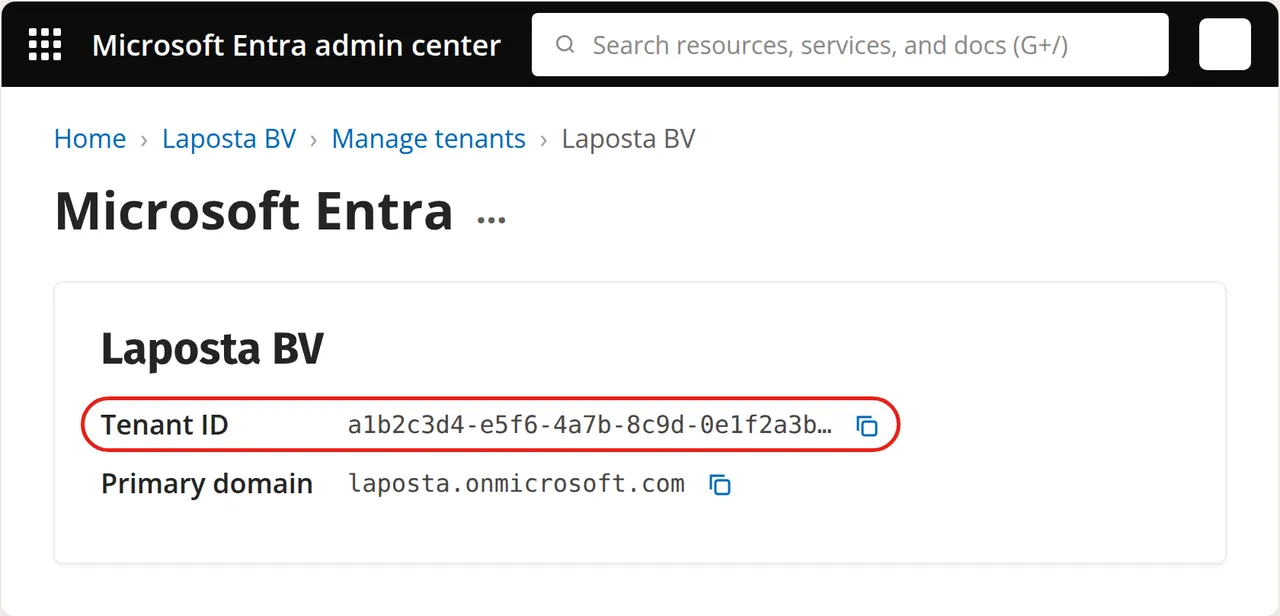
Finally, copy the ‘Tenant ID’.

The Tenant ID in Microsoft Entra
8

Send the details to Laposta

Send these three details (the Tenant ID, the Application ID and the created secret) to Laposta.

Do not send these details by email. The helpdesk has secure methods available for this.