

Assigning a role to a user
A role is a set of permissions that you assign to a user. This role applies within a single account: the same person can have a different role in another account.
You can set permissions and roles with a paid account (a subscription or mailcredits), for an unlimited number of users. If you use Laposta for free, this is not possible: every user has access to everything and therefore sees all lists, campaigns, templates and results. In a free account, you only specify per user whether they are an administrator and are therefore allowed to create users themselves. What you can configure per account type is shown in the table in Creating a new user.
Who is allowed to set permissions and roles?
Only administrators can create new users and assign roles and permissions. The person who creates, or has created, the account is assigned the administrator role by default. You can change this later. If you already had a paid account before 1 July 2024, every user in the account is an administrator.
After logging in, your own role is shown below your account number and username. Under Access, you can read a description of that role, and if you click on its name, you can see what you do and do not have permission to do.
Changing a user’s role
As an administrator, go to Login → Users and open the ‘Manage’ tab. Alongside details such as the name, the selected language and whether or not two-step verification is used, you will see the assigned role for each user. You can assign each role to an unlimited number of users.
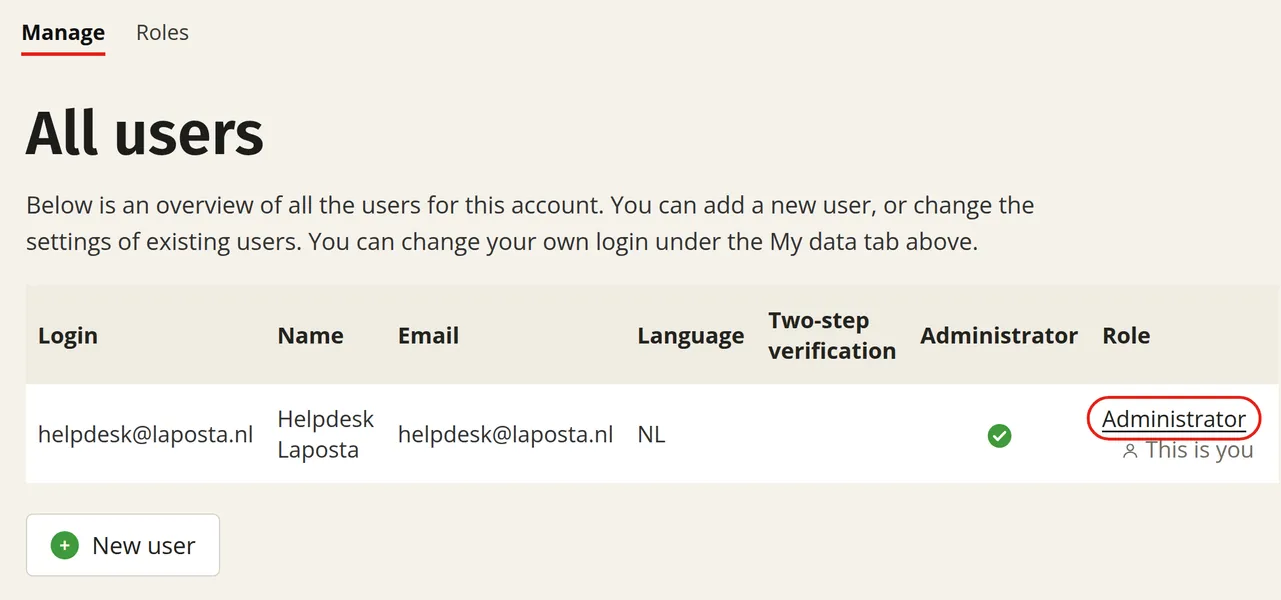
Click on the role next to a user to change it. Choose an existing role (default or custom), or immediately put together a new set of permissions and save it as a new role.
You can also click ‘Details’ on the right-hand side of a user:
- Under ‘General information’, you will find this user’s details and the link they can use to set a new password themselves.
- Under ‘Permissions’, you can see which permissions the user has and change them by choosing a different role, or by adjusting the individual permissions and saving them as a new role.
Creating a new role
In addition to the default roles, you can create up to seven custom roles yourself. You can do this in two places, with the same result: for a specific user, or in the overview of roles.
For a user
In the overview of roles
In the ‘Manage’ overview, click on the role to the right of the user. Select the bottom option, ‘New role’, and tick the desired permissions. As a starting point, you can first choose all permissions (‘all’), no permissions (‘none’), or the permissions of a default role.
Give the role a name and a short description, which other users will also see, and save the role. The user is assigned the new role immediately, and you can then also assign this role to others.
Viewing, editing and deleting custom roles
A custom role is listed in the overview of roles (Login → Users → Roles) under ‘Custom roles’. Click ‘Details’ to the right of the role to edit the permissions for that role and to see which users have been assigned the role. If nobody in the account has been assigned the role, you can delete it.
Permissions apply per account
If you restrict the permissions of users, you do so for the entire account. For example, if you specify that someone is allowed to delete or empty subscribers, that person can do so for all subscribers and lists in that account.
If you want to restrict permissions to specific lists or campaigns, you can do so by working with multiple accounts. You can then place parts that you want to keep separate in a separate account with its own users and roles. To manage those accounts, a management environment is available, with its own user management across all accounts.